Sometimes, the stock stereos break down, and there’s nothing you can do about it – only remove the thing and replace it. In other cases, you get a bit tired of the boring factory head unit and want to install a brand-new system with more features, knobs, and a better sound. But how do you get rid of the stereo? How do you remove it without the right equipment for the job?
Is it really possible to do that when you don’t have DIN slash radio keys? The answer is yes, you can replace the old head unit with a basic set of tools. The whole process will take less than an hour, even if you don’t know your way around car electronics. So, join me, and let’s see how we can pull this off!
Table of Contents
Getting Started

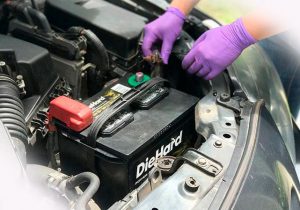
The positive terminal/cable shouldn’t touch anything metallic either. The negative is marked with a “– “ symbol, and it’s colored red. The positive, in turn, is black and is marked with a “+”. As for the required tools, a flathead screwdriver, a pry bar, a socket wrench, and a pair of protective gloves are the only equipment you’ll need for today.
Popping off the Trim

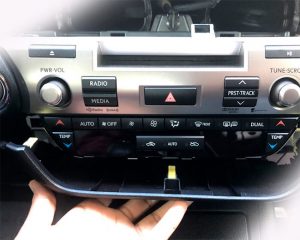
So, use a screwdriver (preferably, one with a flat head) to pop it off. Carefully put it under the trim and apply just the right amount of pressure for it to come off. Don’t overdo it, though: if the trim is refusing to pop off, maybe there’s a “secret” bolt or screw somewhere – find it. The trim isn’t very cheap, so, if you damage it, that’s gonna cost you a pretty penny.
What’s the Deal with New Vehicles?

The same is true for any other metallic instrument. They can damage the plastic and, like in the previous case, cost you a hefty repair check. You’ll need a pry bar for this (a plastic one, of course). I recommend working it around slowly, again, without applying too much pressure. If you do everything right, the dashboard will be off before you know it.
Removing the Stereo
Alright, now we can finally get to the budget car stereo. Most head units are secured by a pair of clips – one on each side. These clips are located in two slots, and to get to them, you’ll need something long, thin, and sharp. It might take you a while to find these slots. If you’re having difficulty locating them, use a flashlight. On some modern-day SUVs and trucks, there are two holes on each side, instead of one.
Now, before you get to work, check your vehicle’s user manual. There, you’ll find all the necessary information, including how to access the clips without damaging the car stereo or any other electronic components of the car. Obviously, radio keys are the best tool for undoing the clips, but, since we don’t have any of those lying around, we’re going to think of something else.
The Best Alternatives to Radio Keys
Hangers are pretty great, along with files. Some folks use thin knives, but those can be dangerous when not handled properly. In my experience, a piece of wire can be a very decent “instrument” for reaching the clips. You’ll need two of those so that you can undo the clips at the same time. But wait: how do you know that the clips are released? You’ll hear a distinctive clicking sound.
If there is no sound, that means you’re doing something wrong, or your wires are simply not going deep enough. And remember: don’t remove your DIY keys until the car stereo is out of its spot. If you remove them too soon, the clamps will snap back, making it much harder to take the radio off. I mentioned earlier that the most recent cars have dashboards instead of trims. Well, on top of that, they also have screws and bolts instead of clips.
So, if you don’t see any slots for the keys, best believe the stereo is secured by a set of screws of bolts. A screwdriver or socket wrench should help you remove those easily. Don’t forget to store the bolts/screws somewhere safe so that you can use them later.
Sliding the Stereo Out
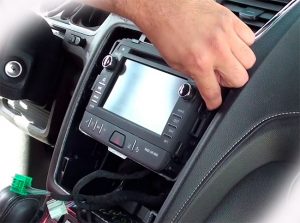
Well, here we are – all that’s left to do is remove the stereo head unit! Just grab it and carefully pull it out from the dashboard. If it’s not giving up easily, try jiggling the device slightly. This is important: don’t pull it too far, because once the stereo is out, you’ll see a set of wires plugged into it. Disconnect the wires; if they’re connected via a clamp, squeeze it and pull. Ok, now you can go ahead and install a new stereo!
Conclusion
And that is it for today, dear friends! Removing the factory head unit in your car can be tricky, but only if you’re not sure where to start. In contrast, when you know exactly what to do and have the right tools, this will be like a walk in the park. You will, of course, have to follow the instructions very closely. And please, if you feel like the task turned out to be more than you can handle, let a professional do it instead.
Otherwise, you may end up damaging not only the stock car stereo but also the dashboard and other systems. But, I want to stress out once again that there’s nothing hard about this. It’s a very straightforward process. So, drive carefully, take proper care of your vehicle, and enjoy your new stereo!


Leave a Reply